Wednesday, September 23, 2015

Spool Knit Snails

Spool knitting, also known as corking or French Knitting, is a classic craft activity. It's easy to do and a little bit addictive. But what to do with all of this knitted cord? One idea is to add a spot of felt and some other embellishments and make a charming little snail. 


By coiling the cord into a spiral shape, it can mimic the shell of a snail quite convincingly:


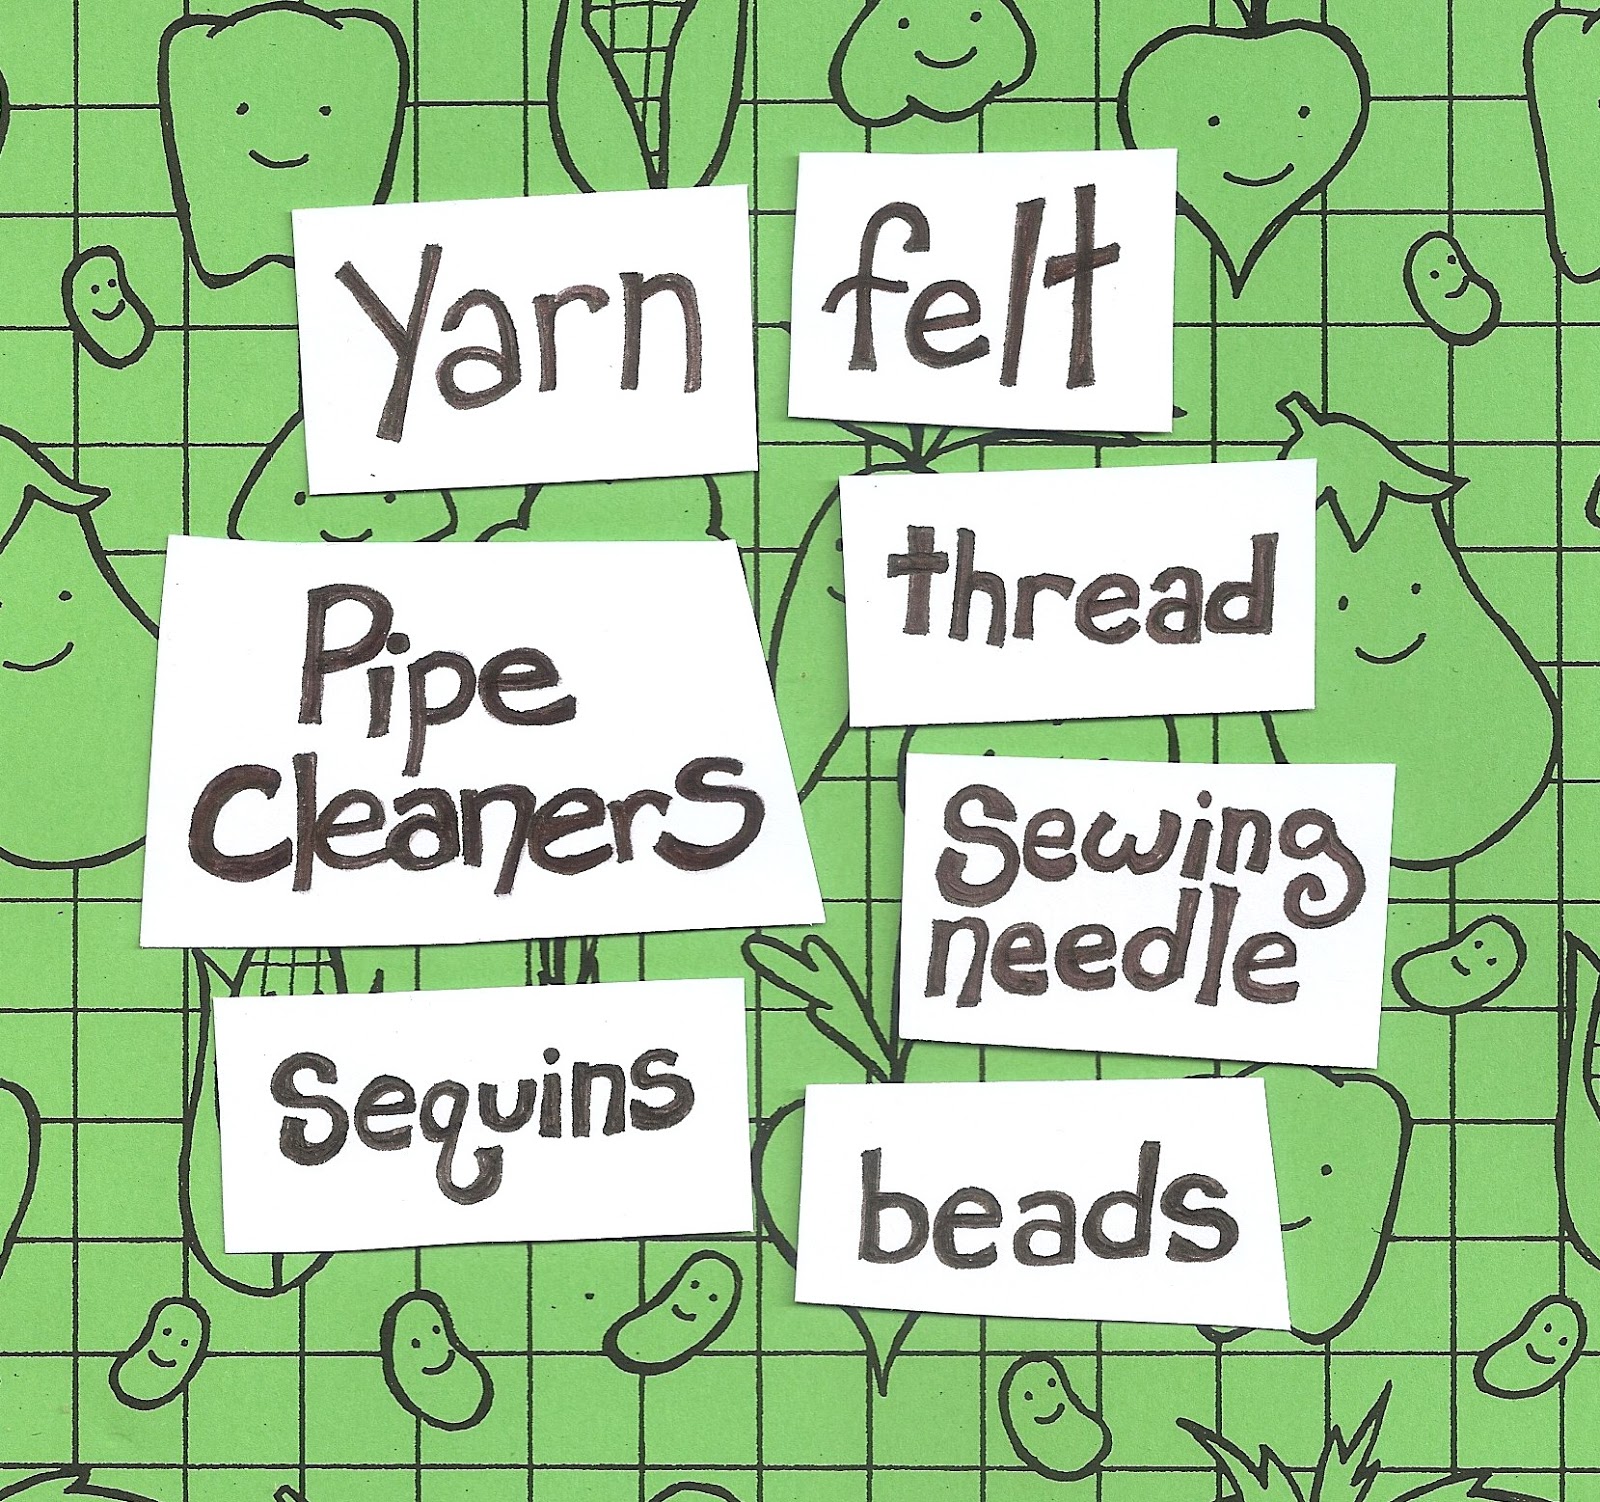
Here are the materials you'll need for this project:


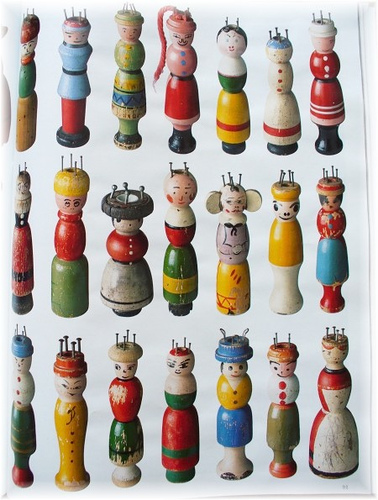
One more thing that is vital for making these snails is some sort of spool knitting device. There are lots of spool knitters out there, often made of wood and painted to resemble little dolls:


If you don't have a "Knitting Nancy", you can easily make one with a few simple odds and ends


Here are some instructions on how to knit your cord:


You'll need to knit between 7 and 9 inches to make the shell, depending on how big you want it and how bulky your yarn is. 


Once you've made that, it's time to give the shell its shape.


Thread the end of yarn through a large needle and sew the knitting into a spiral.


Now that the shell is finished, the next step is to make the snail's body. This requires two pieces of felt, one that includes the head and the backing for the body, and one for the front side of the head.


For the face, you'll need a short length of pipe cleaner, a white sequin, and a small black bead.


Sew the eye onto the front side of the snail's head.


Fold the little bit of pipe cleaner into a v-shape. I suggest curling over the ends so that they don't poke you!


Now sew the front of the head to the back. Once you get to the top, attach the pipe cleaner between the two pieces of felt. Make sure to add a couple of stitches between the pipe cleaner so that it stays in place.


Once the two head pieces are sewn together, it's time of add the shell to the backing by sewing the felt all away round the outer layer of the shell.


And there you have it: a friendly snail with a fuzzy coiled shell.


If you'd like to keep your snail with you throughout your day, you can sew a safety pin to the back and wear it as an attractive accessory:


Snails are very cool creatures. Here are some interesting facts about snails that prove what wonderfully odd beings they are. 


For years I kept snails as pets. They're fascinating little creatures, and I loved watching them go about their slow-paced lives. If you're interested in pet snails, this website has excellent information about how to keep them happy and healthy.


Friday, July 31, 2015

Thaumatropes

Our minds and our eyes work together to allow us to understand the world around us. The mind takes the information received by the eyes and sorts it out so that we can perceive things such as colour, brightness, movement, depth, distance, space, and all the other elements that make up our visual environment. In most circumstances, this process is pretty straightforward and we can trust that the things we see are real, but artists have known for a long time that the mind can be fooled! Certain techniques can be used to manipulate the mind into "seeing" things that aren't really there. We call these tricks Optical Illusions. Artists have used various types of illusions in their artwork for centuries to create a sense of depth, space, and even motion into their flat, static paintings and drawings. In Victorian times, people became fascinated with the idea of optical illusions that didn't just operate on a two-dimensional plane, but incorporated movement into their visual trickery. A whole slew of spinning, flipping, turning mechanisms were developed. (Eventually these devices paired up with another 19th Century invention, photography, and the animated motion picture movie was born.) 

The thaumatrope is a very simple device that is fun to make and play with. Here's what you'll need to make your own:


The first thing you'll need to make is a circle of card stock. This will be both the basis for your thaumatrope and the template for your drawings. This is important because if your drawings aren't aligned properly, the illusion created by the spinning thaumatrope won't work. 


The best way to make sure your images are aligned is to match them up with two holes made across opposite sides of the centre of your circle. One easy trick for finding the centre of the circle is to cut out a second circle of the same size, to fold it in half, line up the folded semicircle with your original card stock circle, and trace a line along the fold. 


Now that you have your template, trace it onto a piece of paper and sketch out the image you would like to appear on your thaumatrope. Don't forget to add the holes- this will be crucial for aligning your pictures (I suggest making them with a large pin or sewing needle). 


Now you have to decide what part of the image will go on each side of the thaumatrope. I chose to put the elephant on one side and the fireworks on the other. To make sure everything is in alignment, trace the pictures from your original sketch. This is where the holes come in handy; if you line them up on both sides, the whole thing should work magically when it's put together.


If you like, you can add some colour to your creation.


Now cut out both drawings.


This part gets a little tricky. As I've already mentioned, proper alignment is key. Glue the images to the card stock, but make sure those holes are in the right place! Once your first image is in place, flip the card over along the same axis as the holes, i.e. the top on one side will become the bottom on the other. Then glue the other image the same way as the first. 


All that's left to do now is to add two loops of string through the holes, one on either side. 


Now you're ready to create the illusion of two images blending into one. Simply grasp one thread in each hand, pull them taught, and twist the strings back and forth between your thumb and forefinger. 


This is a video of my firework elephant in action:


Here are some other examples of thaumatropes for a little inspiration:


If you'd like to learn more about the wonderful world of Victorian moving picture devices, this book is a great resource.


Wednesday, April 29, 2015

Foam Dot Bracelets

This is a really simple project I came up with when looking for a use for leftover scraps of craft foam. I love finding ways to use up bits of materials that would otherwise just get tossed out, since I think it's important to be mindful of the amount of waste our creative projects can generate. I also really enjoy this project because the technique is simple enough for quite young crafters, but the results are sophisticated enough for older ones too. 


Here's what you'll need to make this project. (You can substitute regular thread for the elastic kind, but then you'll either need a clasp to do up the bracelet, or else tie it on permanently.)


The first thing you'll need to do is punch out some dots from your scraps of craft foam using a hole punch.


Since the dots are very thin, you'll beed a lot of them. (I used aprox. between 110-130 dots for my bracelets, which fit around my own adult wrists.) 


Once you've got a good amount of dots, the next step is stringing them together. A large needle with a sharp point works best, since it will need to poke through the foam. (If you are making this project with young crafters and are concerned about safety, have an adult help string the dots onto the thread.)


I recommend using elastic thread so that the bracelet can easily be slipped on and off. I also made a bracelet with a jewellery clasp closure which works well, but is a little more finicky. Another option is to just tie the bracelet around the wrist like a friendship bracelet, but then there's no way to get it off.


I made a few variations of this basic design. I made ones in repeating patterns, some with different shades of a single colour, and some with added random beads. (Repeating patterns are a great way to practice counting and memory skills.)

 I think they look especially good when a bunch of them are worn together.


A fun and easy way to add a touch of flair to your look!

Friday, March 27, 2015

Cotton Ball Sheep

Spring is an extra special time of year, filled with the promise of warmer days and new life. It is a magical time when plants begin to push their first green shoots out of the ground and when many baby animals are born. One of the most delightful of these baby animals are lambs: 

A mother sheep with her baby lamb

Sheep are pretty fascinating creatures as you can see in this video of farmer Adam Henson learning about the behaviour of the sheep on his farm:


Although I likely won't be lucky enough to see any real sheep this spring, I thought it might be fun to make some of my own


Here's a list of the materials required for this project:


Because I have a dog, I've also got a constant supply of little cardboard tubes that are on the inside of the rolls of plastic bags I use for picking up his poop. These are really useful for craft projects, so if you can get your hands on them, they're worth saving.


If you don't have any of these tubes, you can make your own out of card stock or some other stiff paper. Cut a strip a couple of inches high and half the width of the sheet of paper. Wrap it around a pencil and add some glue so that it stays rolled up. You'll need four of these- one for each of the sheep's legs.


For the body of the sheep you'll need a toilet paper roll. Make four holes on what will be the underside of the sheep, two near the front and two near the back. Make some small cuts radiating out from the hole in a starburst pattern- this will allow the legs to fit in snugly. 


To finish off the sheep's body, trace around the edge of the roll to make two circles from the lid of an egg carton. Using some white glue, add these to the roll to make the sheep's chest and bum. 


The egg carton is also what I used to make the sheep's head. The rear part of the head is made from one cup, while the front part requires additional portions from the adjacent cups- these will become the sheep's ears.


Attach the two parts of the head using white glue. At this point, you can also paint the head and legs white.


To attach the sheep's head to its body, poke hole for a toothpick into the shoulder-area of the body and the base of the head.


The sheep also needs a tail! I cut one from a scrap of the egg carton lid and glued it to the top of the rear of the body.


Now it's time to add the sheep's fleece. Take some cotton balls and add them to the body with glue. I started at the back and worked my way to the front adding the balls in layers around the body to make sure I covered all the cardboard evenly.


Once the body is done, it's time to finish the sheep's head. Using markers, I drew on eyes, a nose, a mouth, and some detail inside the ears- pencils, crayons or paint could also be used to make these features.


Glue more cotton balls to the back of the head and then attach it to the body by fitting it onto the toothpick.


And there you have it! A lovely, fluffy springtime sheep: